Showing posts with label Do it yourself. Show all posts

Thursday, November 5, 2015

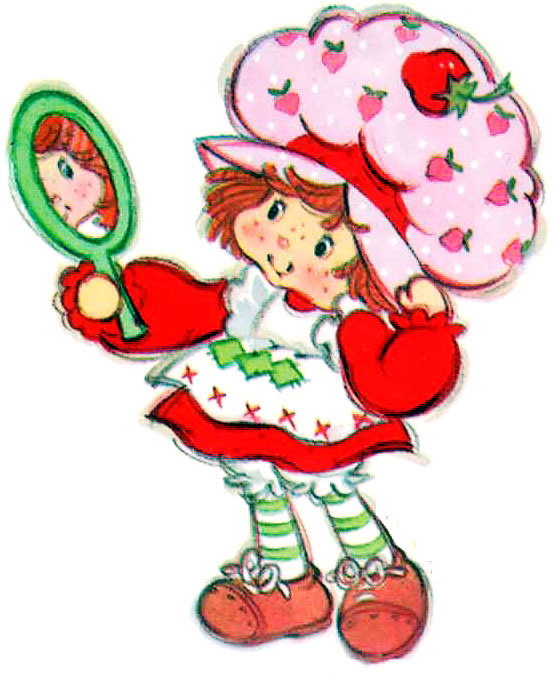
DIY Strawberry Shortcake Costume!


As I promised in my previous post, I am back with instructions to put together this Strawberry Shortcake costume for your own little trick or treater! I am thrilled to share these patterns with you that I used to put together this adorable costume! I am so proud of how it turned out and would LOVE to see your photos as well if you use it!

Before I get to the tutorial, can we just all collectively marvel over the cuteness for a minute? Okay? Okay! Because it was almost too much for me to handle on my own.

For this photo we were so lucky to have the chance to shoot with the incredible Hannah Joy of Hannah Joy Photography. If you're in the area, I cannot recommend her enough! She is beyond a talented photographer but also has this unique ability to connect with her subject, even these stubborn little ones, and getting gorgeous photos! I just love this one so much!

Now, onto the patterns!

I scoured Pinterest for costume ideas and from the start I knew I wanted to model her costume after the more vintage version of Strawberry Shortcake rather than the newer one. Despite all of my searching, I didn't really find clear instructions anywhere so I set out to create my own.

For the red dress I followed this Sunday Best Dress Pattern from Bobkin Designs. The pattern level was for Intermediate sewers, and I found it easy to understand and follow. It comes in sizes 1 through 8!

For the apron I followed this Girls Pinafore Dress Pattern from The Tie Dye Diva. This patterns goes up to a size 10 and would be so versatile for so many projects! I will definitely be using it again. The level is marked for beginners and I found it easy to understand and follow as well. I did add the red trim and I used leftover fabric from the dress and other projects to freehand the diamond and strawberry appliques.

Onto the hat! Sew Can Do was kind enough to provide detailed instructions to make the hat. I won't lie, I was most intimidated by the hat and saved it for last. I almost didn't even attempt it, but I am SO glad I did. It really was not difficult, came together in under 15 minutes and looks amazing!

Thank you to everyone linked above for your talent and for making my sweet Bee a very sweet little Strawberry Shortcake this Halloween! She loved it, and so did I!

Saturday, October 31, 2015

Happy Halloween!


It's no secret that Halloween is a very favorite holiday here at Brightly Living! I have always enjoyed Halloween, but having a child to share it with makes it extra special!

Trick or Treating each year in the Historic Springfield neighborhood of Jacksonville, Florida has become our annual tradition! This was our third year and we never get tired of seeing the community come alive with decorations, music, and trick or treaters! 

Bee had an amazing time with old and new friends and of course scored plenty of candy and other goodies! This year she chose her own costume, Strawberry Shortcake! Her father and I joined in the fun and went as custard and pupcake.

This costume was one of the more intricate pieces I've made, so I am very excited to share it will everyone! I am planning to post a tutorial soon as well, so stay tuned!


Wednesday, January 15, 2014

DIY Play Kitchen

For months I have been keeping my eyes open for a great deal on a piece of furniture that I could turn into a play kitchen for Sweet Bee. A great wooden play kitchen can be anywhere from $100 - $400, and it was simply not in the budget.

So you can imagine my excitement when I saw these beautiful, matching nightstands on craigslist for $10.00:


A few craft store supplies including wooden discs and E-600:
 Some hardware from my local Habitat for Humanity Restore:

 An old cabinet door from the side of the road, and finally, some old-fashioned elbow grease:


Turned these fabulous nightstands:


Into this fabulous kitchen!


Tuesday, March 12, 2013

Kitchen tour

In keeping with our theme for March I'd like to share a tour of our kitchen. Here is our space:


And another angle: 


We love this room. It's a bright, sunny, beautiful space for nurturing and play. The best part is that it's baby proof, so there's nothing within Bee's reach that can harm her and no reason for us to limit her access in the kitchen. I've written about baby proofing here and here. I believe that a safe place for a child to freely explore is an essential need, and it's one of the core values our home decorating and layout is based upon. 

In the kitchen, we've provided Bee with several areas of interest as well as eliminated some of the common kitchen dangers. We don't have anything dangerous in the bottom cabinets and we store our cleaners in a different room. This allows her to really get into everything and she spends so much of her day taking things out and putting them back - pots and pans are a favorite! So, let's take a closer look:


We've painted the outside of our pantry with a black chalk board paint and have given Bee her very own space to use for artistic expression. She delights in scribbling! When she's done, we put the chalk away inside the cabinet and out of her reach.


We have dedicated the bottom drawer in the refrigerator to provide her a space for healthy snacks that she's able to help herself to throughout the day. I try to prepare two options each morning for her to select from.


We purchased an inexpensive child table from ikea and it is the perfect spot for Bee to enjoy her snacks. I also found this beautiful child sized pitcher which I fill with water in the morning and place it on the table so that she's able to pour herself a drink throughout the day. She is becoming so great at pouring! 


Sometimes allowing a child to practice helping themselves means there are messes to clean up, and that's okay! It's all a learning process. 

I've hung a towel for spills at her level. She is not at a stage yet where she cleans up her own spills, but given the opportunity, she loves to help! 


This child set broom and mop set is another wonderful way to foster independence and encourage keeping a neat space I made the stand by cutting cardboard, wrapping it in wrapping paper, and taping magnets to the back. It works perfectly and looks great! 

Thursday, March 7, 2013

Montessori in the kitchen

We are busy settling into our new home, and while we do I'd like to make a series of kitchen themed posts over the month of March - I hope you all enjoy them!

I know many parents, myself included, who struggle to find a balance between housework and parenting in their day. I have set up my kitchen to help with this challenge and I'm thrilled to share some of my strategies here. For Bee's first birthday, her father and I built her this great learning tower. These wonderful towers help put the child at counter height to foster their desire for independence, and it's enabling Bee to become quite the little helper! One of our favorite activities is preparing meals together.


Before I start, I'll clarify that this stove is not turned on, and the pan is not hot. We're using the pan as a large mixing bowl to prepare our lasagna in a crock pot. Look how thrilled Bee is to be included in this activity! By allowing her to help at meal time, I've been able to strike a balance between giving her the attention she requires and also cooking dinner.


This is the face of someone truly delighted in their work! Preparing meals is such a sensational task for toddlers. It allows them to mix, stir, pour, fill, empty, rinse, dry, taste, scoop, and more! 


Here she is taking advantage of the opportunity to taste new things - frozen spinach! I love the way that cooking together builds her sense of curiosity, she has such an inquisitive nature and really takes the time to inspect our ingredients. 

Monday, September 3, 2012

A furniture makeover

With Bee becoming so mobile within the last few months we've started to shift our efforts towards baby proofing our living spaces. Creating a safe space for her to investigate without interruption has been one of our highest priorities lately. I believe that we've created a wonderful 'yes!' environment for her, where we don't have to worry about constantly redirecting her or telling her not to get into things - everything is fair game!

The first step was finding a tv stand which was high enough to keep the tv out of reach and organizing the electronic cords so that they were hidden and out of the way. The television set was probably the most dangerous item for Bee in the entire room, and it quickly became her greatest interest, so a solution was in order - and what a tall order it was! We needed something high enough so that she couldn't reach the top. Something sturdy enough so that tipping wasn't a concern. Something which had doors that could keep all of the cords and accessories hidden away, but not glass doors! Something that was functional, but also aesthetically pleasing, and most of all within our budget.

...and we never found it. So, instead we revamped a piece of furniture that was given to us by Bee's grandmother (thank you!), a hot bar meant for serving food. Here it was before, in all it's hot bar, food-serving glory:


And, after a little demolition took place to remove the border on the top surface:


We sanded it, repainted the hinges and cabinet hardware, removed the hardware from the drawers, filled in the holes that held the old hardware in place, drilled new holes for the glass doorknobs, painted, and black washed. In the end, we got this:


You can still see the previous holes a little on the drawers and we're largely undecided about the black wash,  but overall we are in love with this piece and how perfectly it fits all of our needs.